May 1966: Overview

It’s finally Spring!

We had a terribly cold April where I live, with rain and gloom and the sense that spring would never come. I had switched out my winter and summer clothing as part of spring cleaning last week and it all felt wrong. Then, all at once, two days ago, winter ended, the sun came out, and temperatures doubled. Perfect timing for the “Summer Plans” in the May 1966 issue of Stitchcraft!

The May to August issues always have lots of projects for travel and holidays: little summer tops, quick bulky jackets and sweaters for cooler weather or sailing holidays (aka normal summer in a temperate/maritime climate) and easy homewares to make in a deck chair while lounging about. The pullover on the cover is made in DK wool, so relatively warm, but with a lacy front to keep it airy. The photo is also almost an exact copy of the March 1966 cover photo! Apparently yellow is still trending.

Other women’s garments include a ribbed and a plain polo-neck jumper designed on “skinny lines” — the ribbed number is a special design for extra-slim Twiggy figures with a 30, 32 or 34 inch bust. For “figure-plus” sizes, there’s a summer blouse in bouclet wool with a wide, rolled collar and chequerboard lace pattern. There’s a plain DK cardigan in a range of average sizes to round out the tops, and an easy crochet dress with “practically no shapings”. High necks and clean lines are in, and stitch patterning is kept to a minimum in favour of little details of colour and finishing — see the smock-like embroidery on the “skinny” jumper, or the twists of colour on the collar and cuffs of the polo-neck. Colours are light but bold — light blue, white, green, yellow and pink.

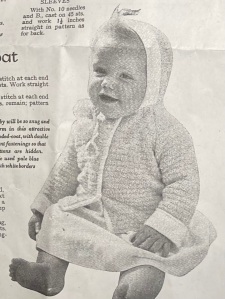
The other members of the family are well served in this issue too. There’s a men’s “country pullover” in a zig-zag stitch pattern, as well as a bouclet “tennis shirt”, both in neutral colours of “Alabaster” and “Brandy” — even the names of the colours fit the image of 1960s masculinity. The “young fashion” set can have fun in a striped and belted mini-dress. Stitchcraft informs us that the “Young Colour Choice is mid grey and white”, which is interesting, considering that the adult women’s fashions are all quite a bit more colourful. Younger tots can make “Seaside Plans” in a t-shirt-and-trunks set for a boy or a little knitted dress and head scarf for a girl. (Why no trunks for the girl, whose dress is going to fly up over her as soon as she starts digging in the sand with that bucket?)

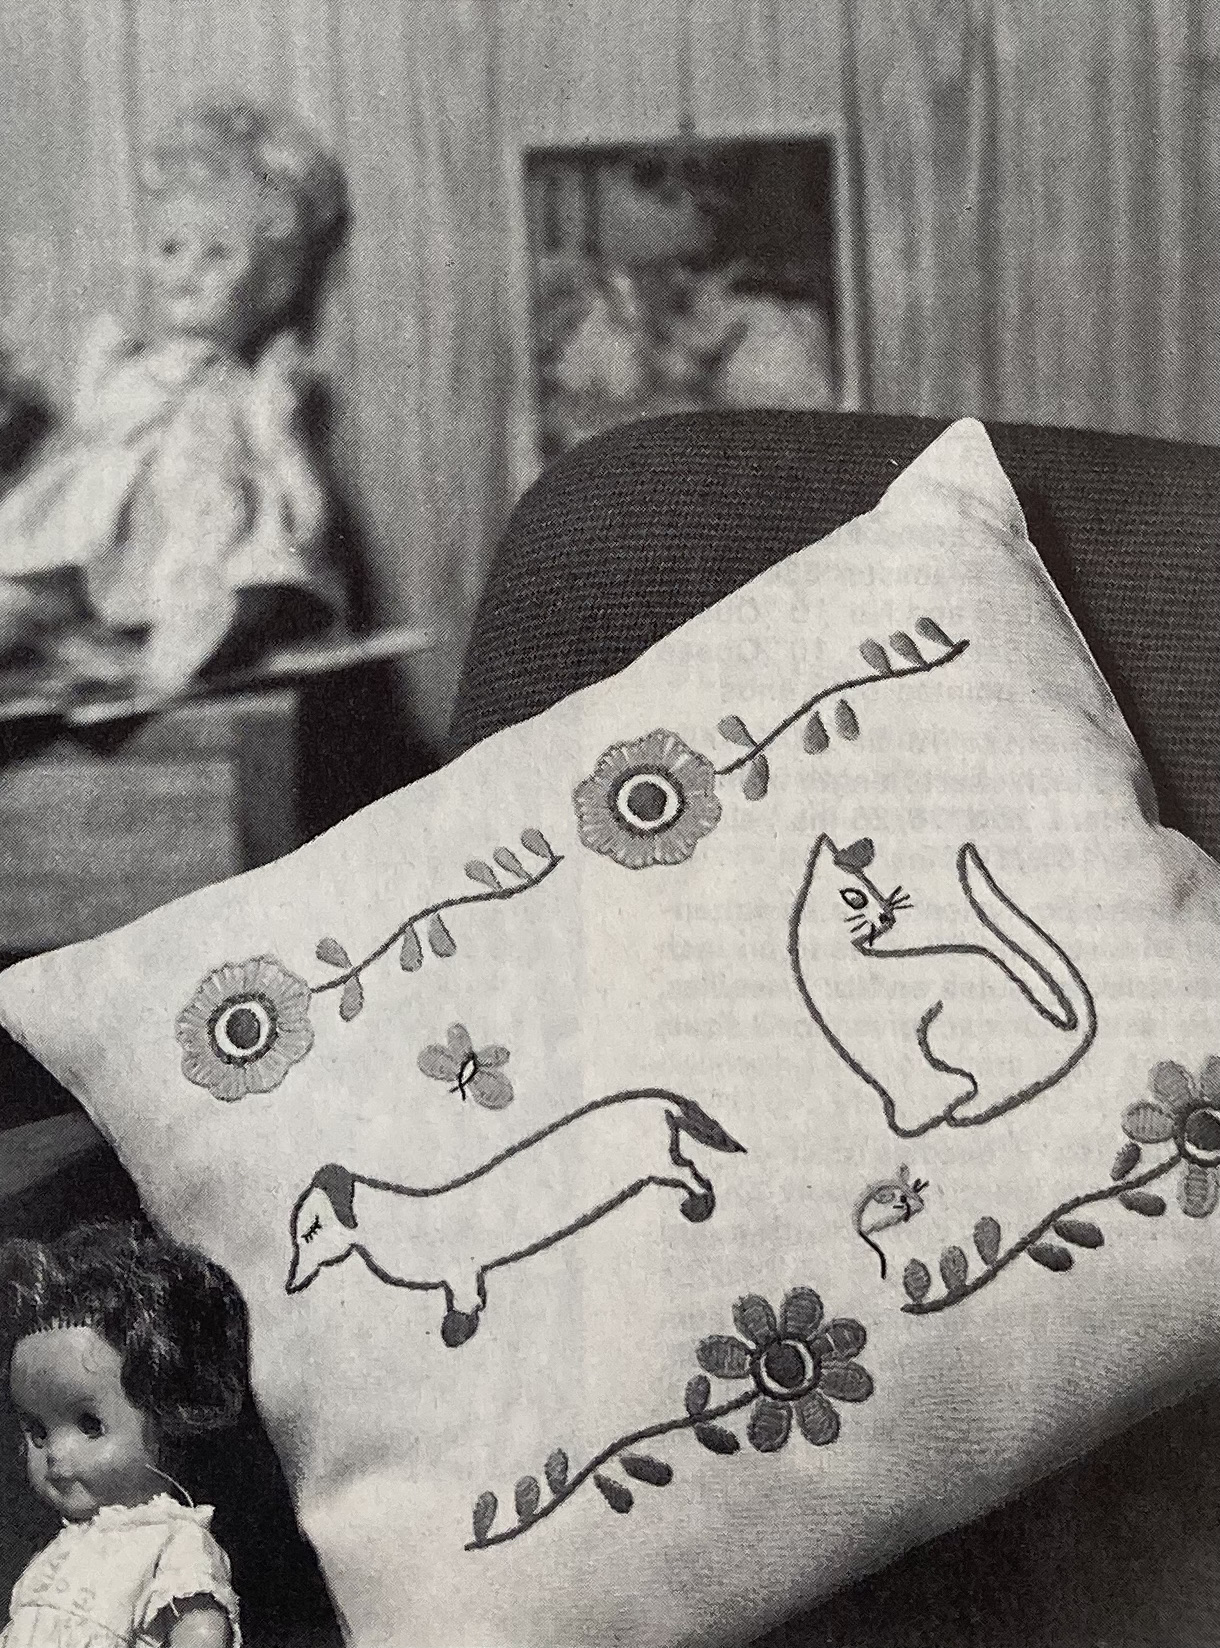
There are some nice child-appropriate homeware designs as well, starting with a thick, warm pram blanket in blue and yellow (to match the mother’s jumper!) The pattern is a herringbone tweed alternated with cable panels and the finished blanket is edged with satin ribbon. Then there are some wonderful decorations “for the nursery” featuring friendly animals and flowers. You can work them in felt appliqué on a wall panel, or in wool embroidery on a cushion. The animals are so cute! I love how the cat is both guarding its mouse and disdainfully looking away from the dog on the cushion. Whoever designed this obviously had a cat.

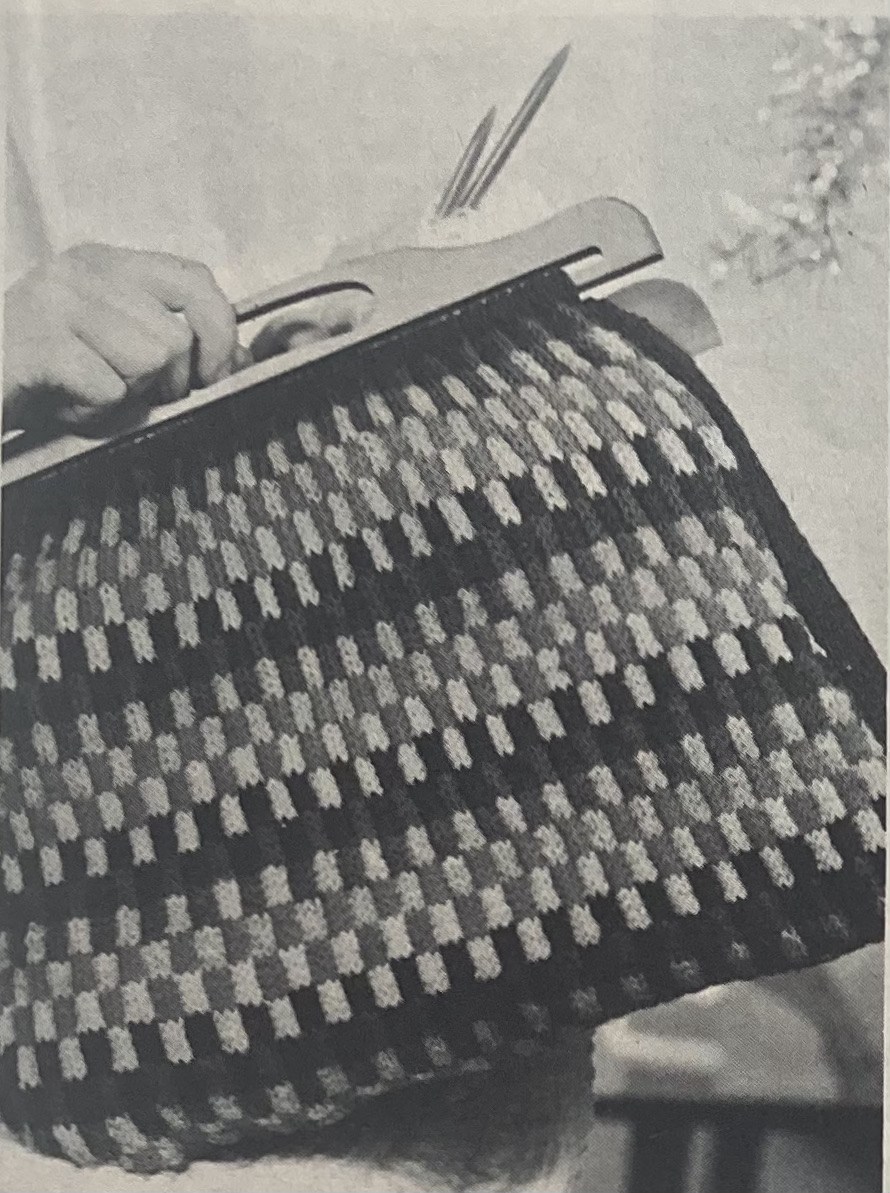
The normal homeware items are, well, normal: two different flower tapestries for a wall panel, the smaller of which can be used for a spectacles case; a tapestry chair seat, a stitched rug and waste-paper bin cover in an easy geometric pattern, a beach bag with beachy motifs (anchor, shell, beach grass) to embroider, or, for people who don’t like to relax on their holiday, a pair of intricately crocheted trolley cloths in a star design.

Saving the best for last, there are designs for two oversized, tall hats. The knitting itself is very easy, but the making-up is complicated, with lots of stiffening in the lining to make the hats stand up off of the head. It feels like Stitchcraft is finally getting into the “fashion fun” era of the 60s, albeit a little late and still pretty conservative.

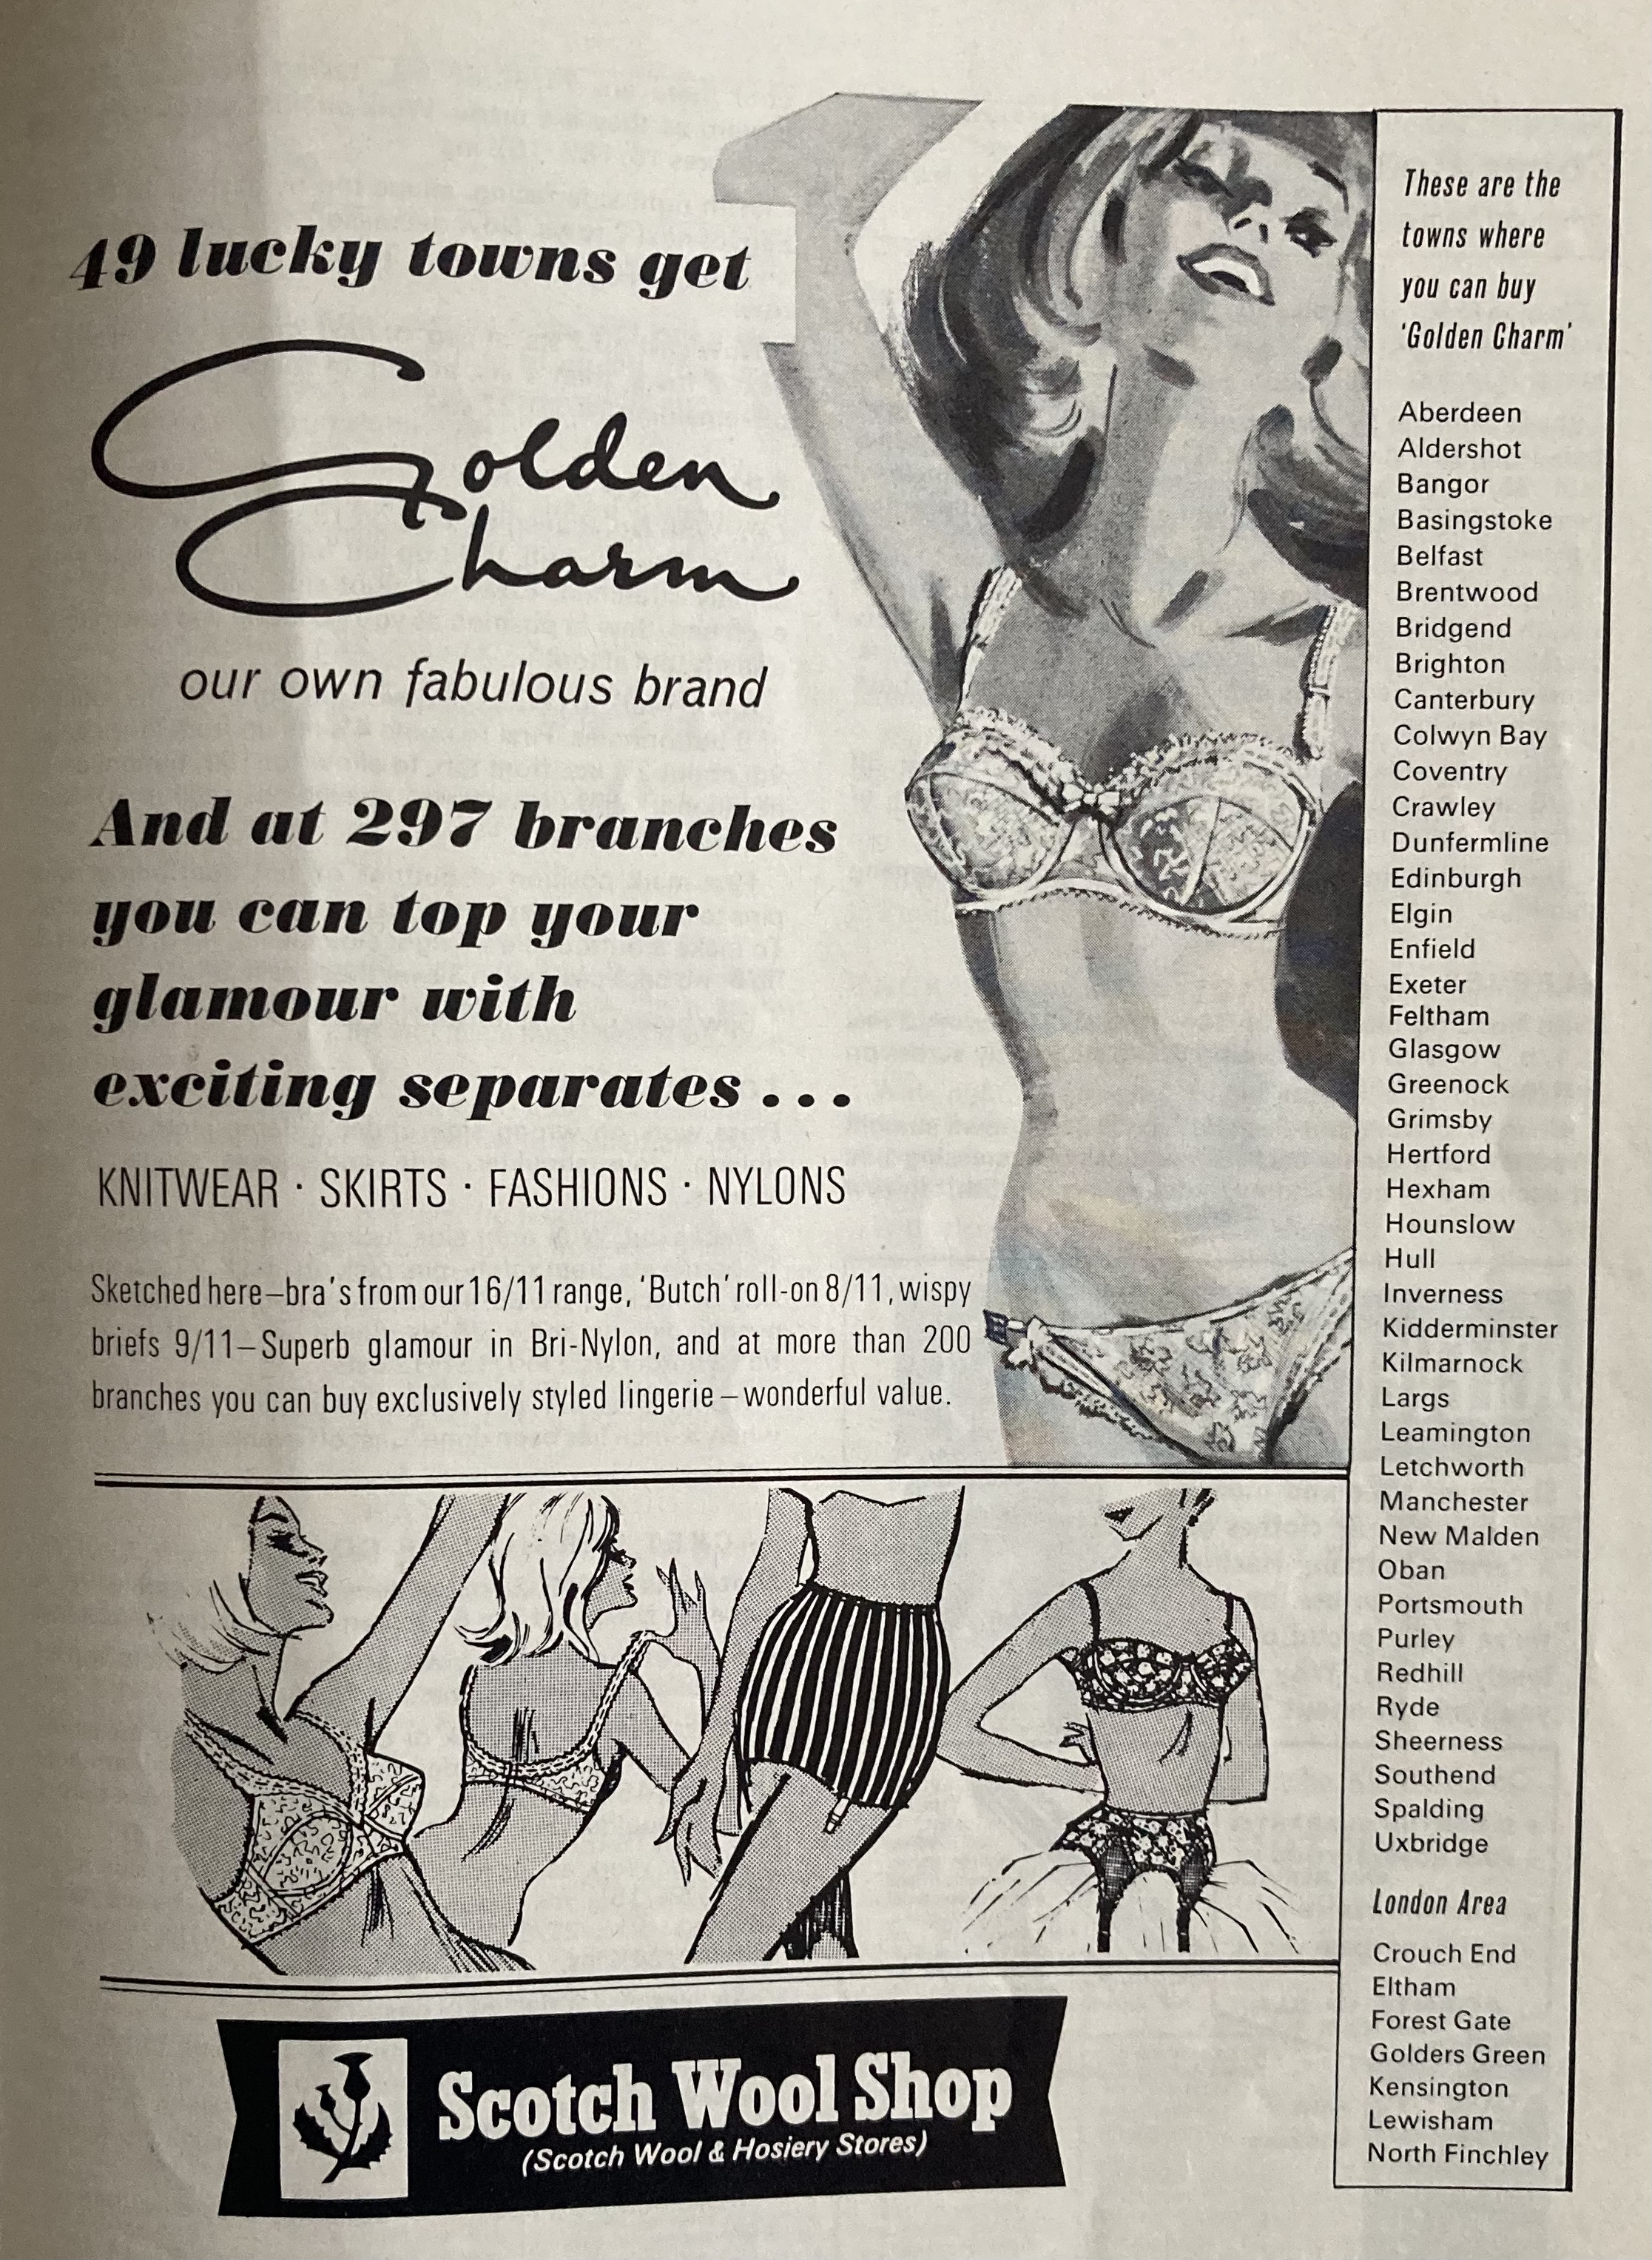
In the back pages, there’s a teddy-bear motif to knit or embroider and instructions on how to make a pom-pom (two cardboard circles). Eustace the elephant from the children’s comic has eaten delicious buns for tea and helps a mother duck encourage her son to learn how to swim. Finally, “Slip Into Orbit” with these “deliciously private-eye-catching” undergarments from the Scotch Wool Shop! The space age has arrived and we are going to celebrate by wearing pretty underwear.

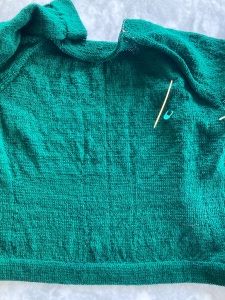
My project this month will probably be some variant on the animal/flower appliqué or embroidery. Enjoy the Spring!

April 1966: Knitted Lamb

My Stitchcraft project from the April 1966 issue was actually a reprint from the March 1957 issue: a knitted lamb as an “Easter gift for a toddler.” Knit a little lamb for your knitting friend who is about to have a baby, they said. It will be fun and cute and use up leftover bits of wool, they said…

My first clue should have been the fact that there is no accompanying photo of the finished lamb in the 1966 issue. Either the original issue didn’t have a photograph (I don’t have the 1957 issue in my collection) or they just didn’t reprint it along with the pattern, since the latter version only has a drawn illustration. Why would the editors not want to show a lovely photograph of the lovely finished knitted lamb? Why indeed?

I admit the next step was “my fault”. Since the pattern called for 4-ply yarn held single, and I mostly had fluffy DK-or-thicker alpaca left over from the tot’s coat in February, I chose to adjust the stitch counts for a stitch-per-inch gauge and try to make the lamb turn out the same size as in the pattern. I did the math correctly, but I suspect something may have been off in the row gauge . The pattern starts with the legs and the main body (top part) in multiple pieces (1/2 each of back and front leg) and involves a complicated series of increases and decreases for the shaping. The “corner” on the back legs seemed odd to me, but I know I followed the pattern. Surely it will all come out right when sewn together, I told myself. After all, I successfully grafted the top back “spine” instead of sewing it! Obviously I was good at this! And it did pretty much look like a sheep’s pelt when laid out flat.

The next piece in sequence is the under-body, which is almost the same as the top, just shorter/narrower. I sewed it to the main body as instructed and stuffed it well, as instructed. The back legs were longer than the front ones, and what was with those weird “hocks” now? Shouldn’t they be sort of… attached to the rear end of the animal instead of just hanging off into space?

No matter, I made hooves. I guess the hooves were fine. Then the head, which was made in three parts: two sides and the “head gusset” for the “chin” and neck. I sewed them together as instructed, and it looked like Frankenstein’s lamb. The head was … not as round as in the illustration, and the neck strangely proportioned. Had I done the math wrong? Was it supposed to fit onto the opening of main and under-body? It didn’t really, but I persevered.

Eyes. The lamb needed to have eyes, as well as a symbolic nose and mouth. This was the part I had been dreading. Ever since I tried to knit some decorative stuffed birds that ended up looking sad, psychotic and/or dead (see photo), I have been afraid to embroider eyes on a toy. The eyes in the illustration look like the lamb is rolling its eyes in high annoyance (at all the knitters who fail at embroidering faces, no doubt.) Not wanting to even attempt that, I had the brilliant idea to make “closed” eyes. Just a little upside-down “u” and a smiling mouth! Hurrah, it worked! Little Lamb is so happy not to have been eaten for Easter supper!

Side note, marijuana was legalised in Germany on Easter Monday, one day after I finished this lamb. Perhaps the lamb was celebrating early. In any case, it’s really, really happy.

At this point I was torn between giving up entirely or just seeing it through. Oh, and I had also run out of the alpaca yarn, so when I decided to just roll with it and finish the project, I switched to some mystery something that was also sort of off-white for the ears and tail. The ears looked nothing like the ears in the illustration, but I was getting used to that by now.

I sewed all the bits together and strangely, the head stayed up by itself. And the lamb could almost stand on its own, depending on what position you bent it into and how widely the legs were splayed out. (I do feel like that’s kind of accurate as to how real lambs look when they learn to walk, says the person who has never lived anywhere near the countryside or raised sheep.) The lamb’s “necklace” as given in the pattern was a complicated bit of braiding, knotting and embroidery, to which I said “nope” and made a little green collar with an easy yellow flower instead. (Thank you, Frankie Brown, for writing and publishing a great pattern for the flower. I donated to the Children’s Liver Disease Foundation and can promise you that I am not going to try to sell this lamb!) Luckily, the collar conveniently hid the awkward seams at the neck. Otherwise I would have had to go full Frankenstein and put in some screw-bolts.

And there it was! Behold the finished lamb, in all his / her / its glory. It is so wonky. The more you look at it, the more weirdness you see. But also, the more you look at it, the happier you feel. I love this lamb so much and challenge all of you to look at it and not feel happy with me. I almost want to keep it for myself instead of giving it to the baby… Maybe it can stay with me just a little while longer?

May all your imperfect projects bring you such joy.

April 1966: Overview

The April 1966 issue of Stitchcraft has a “continental” flair, with “softer feminine styling from Paris” and this “Swiss” design pullover in a new “Banana Cream” shade of beige. The cover photo is classic mid-60s fashion photo shoot: layered shades of gold, brown and beige, the model with bobbed hair standing in a diagonal pose, sans-serif fonts and a relatively long, high-necked, unshaped pullover with geometric design in the stitch pattern.

The other women’s fashions have the same easy feel and generous fit, but allow more colour: turquoise and blue are trending this Spring. “PARIS keeps the Crochet Look” in a bright turquoise buttoned jacket, or you can knit a short-sleeved “easy-line sweater” in turquoise and pair it with an unbuttoned “casual jacket” in turquoise and navy for a twin-set effect. Both jumper and unbuttoned jacket are made in a simple slip-stitch pattern with a nubbly effect. The green “blister stitch” cardigan achieves the same effect with simple increases and decreases in garter stitch and rib.

The promised designs from Paris are a knitted dress in “The Granny Look”, “demure in lace with draw-string waist”, and a tweed beret (of course, Paris). The beret marks the start of the mid-late 60s fashion for oversized hats, knitted large and stiffened with “Staflex” lining. It is knitted in reverse stocking-stitch in four parts which are lined and stiffened separately and then sewn together. The model looks so sad! Does she not like her beret? (She didn’t seem to like the crocheted jacket either.) Rounding out the regional fashion parade are his-n-hers pullovers in black and white panels for the “London Look”. I love the vintage coffee set and judging from the photo, so do the models. Maybe the sad model just needs some of their coffee.

It’s a good issue for men and boys: in addition to the black-and-white “London” pullover, there’s a thick, warm knitted “car coat” for men, paired with a boy’s cabled lumber-jacket in the wonderful centrefold photo. A father, a son, a car and a boat! Everything colour-coordinated in those manly shades of red and royal blue! Diagonal poses for everyone!

(Side note: these diagonal poses are very uncomfortable. Sometimes the photographer just holds the camera diagonally, but otherwise it twists your spine all out of shape. I would be a sad model too, if I had to do that all day.)

For “younger folk”, there’s a pretty short-sleeved knitted blouse for a schoolgirl, and yes, a “deerstalker” hunters’ coat and hat for a (presumed male) toddler. It gives me a “so much wrong” feeling. Also, won’t somebody get this kid some clothing for the lower half of his body?

There’s more to come in the homewares department, though Stitchcraft seems to get less and less creative with homeware design as the 60s go on. There are little rugs, either stitched or crocheted in rug wool, as well as an unusually-shaped half-circle rug in Florentine stitch to put in front of a bookshelf. The Florentine design can also be stitched on tapestry canvas for a tea cosy.

A similarly versatile flower design can be made in cross-stitch for a chair set of cushion and back-cover or in tapestry on a church “kneeler” hassock. There’s an embroidered mat set for your dressing table and an intriguing embroidered wall panel of different gourd-type vegetables on a black linen background.

Finally, Easter was in April in 1966 and there are some cute Easter-themed gifts and “novelties”: an Easter egg kitchen bag (to hold clothespins) in felt appliqué and embroidery, a “nursery nightcase” (not Easter themed, but advertised as a good Easter gift) in the shape of a bedtime bus (Side note: when did people stop storing their pajamas or nightgowns in a special bag during the day?) or a knitted lamb toy, reprinted from the March 1957 issue.

To round it all off, there’s a great bathing-suit ad from the Scotch Wool Shop and for the first time, a partner promotional offer from Patons and the Kelloggs cereal company — knitting patterns featured on the backs of All-Bran and Bran Buds packets. The natural laxative foods! These types of promotions became more common in the later 1960s and especially the 1970s. Finally, in our children’s comic, Eustace the elephant and Mark the mouse get invited to tea in a house that Eustace can’t fit into very well.

My project from this issue is already finished… is that cheating? I started it last week to get a head start and it went very quickly. It was the knitted lamb, and though it didn’t turn out quite perfect, I had fun making it and it brings joy to anyone who looks at it. I will post about it soon, along with another destash project from a later issue of Stitchcraft. Happy Spring!

Out of Order: Softly Fitting Cardigan

The March 1966 issue of Stitchcraft didn’t have any projects that particularly called to me, and I am still in destash/finish up old projects mode. So this month, I finally finished the cardigan to the “Softly Fitting” twinset from January 1962.

The original twinset is made in two different colours of the same wool: Patons Cameo Crepe “French Green” for the cardigan and “Pearl Frost” for the jumper. I had already made the jumper in Concept by Katia Silky Lace in a more blue-ish shade of purple, and had 300 grams of wonderful Lana Grossa Slow Wool Lino in stash in a slightly more reddish shade of purple. The two purples harmonised quite well, and although the yarns are different compositions, they are both the same weight and have a similar drape and softness.

Like many designs from the mid-1960s, the cardigan has stocking-stitch hems at the bottom edge and sleeve edge, as well as double front bands. Both hems and bands are made easier by working one purl row on the right side (hems) or one slip stitch every other row at the same stitch (bands) to make a fold line. I made the body hem by knitting one stitch from the live stitches together with one stitch from the cast-on edge all across the piece — nerve-wracking, but saves sewing it later.

The cardigan itself is very easy — stocking-stitch with a little bit of rib detail on the yoke, and set-in sleeves — but the challenge for me was making sure that I had enough yarn. Slow Wool Lino has unfortunately been discontinued, and I bought the wool at a buy-up-whatever-we-have-left type of sale, so the chance of finding any more in the right colour was minimal. 300 grams should be enough, I thought, even for a cardigan with double front bands and a stocking-stitch hem. But to be sure, I knit the front bands together with the fronts and back in one piece and finished the bands around the back neck before starting on the sleeves. Then I knit the sleeves top-down, picking up around the armhole and dividing the remaining wool exactly in half. That way, if I ran out of wool, the sleeves would just be “bracelet length”, which wouldn’t bother me.

What can I say… it was perfect! I hd to use a little bit of the leftover Katia from the jumper to finish the underside of the hem on one sleeve (invisible) and sew down the sleeve hems and front bands (also invisible). Thus the yarn was de-stashed perfectly. The sleeves were in fact bracelet length after knitting, then stretched to normal long length after blocking. (I didn’t even have to pin them, they grew by themselves.) To top it all off, I went down to my local yarn store / mercerie and immediately found buttons that perfectly matched in size, colour and style.

As always, we had fun re-creating the original poses from the magazine.

In the “normally posed” photos, neither I nor the photographer noticed that the collar of the jumper was sticking up. Normally, it overlaps the non-collared cardigan elegantly, as in the other photos. We’ll try to take some more pictures in the next few days if it ever stops raining.

Really happy with this twin set and I’m sure it will get a lot of use this spring. The combination of lightweight wool-silk and lightweight merino-linen makes both pieces very adaptable to changing temperatures, warming and cooling as needed. The pattern was easy and I would recommend it to anyone.

March 1966: Overview

“Knitting GLOWS with COLOUR and Needlework has Distinction for Spring 1966.” is the headline of the March 1966 issue of Stitchcraft, featuring a new yarn, Patons 101 Double Knitting Courtelle.

“Courtelle” was a synthetic fibre developed in the late 1950s by Courtaulds Ltd, a textile manufacturing company that expanded to include artificial silk (rayon/viscose) at the beginning of the 20th century and went on to produce many different types of artificial and synthetic fabrics, either cellulose-based (acetate, lyocell) or acrylic. Courtelle was an acrylic fibre, 100% synthetic, and featured in many different brands of hand-knitting wool around this time, such as Chadwick’s, Bairnswear (the company was bought by Courtaulds in 1953), Emu or Sirdar in the UK, Sofil, Laines du Pingouin or Georges Picauld in France, Austermann in Germany, Elle, Fiesta or Saprotex in South Africa, Phentex in Canada, and so on. As Patience Horne writes in this month’s issue of Stitchcraft, it was “easy and smooth to knit” (didn’t tangle), “very economical”, and “washes and wears wonderfully” (didn’t shrink or fade). She also claims it was “lovely warm” (pretty sure one sweated in it quite awfully) and “light as a feather” (it was not).

These days, of course we know that synthetic fibres pollute the environment quite terribly in the course of manufacturing, are non-biodegradable and generally not recyclable, and that washing them releases microplastics into wastewater, the long-term effects of which are not wholly known at this point, but certainly not good for human or animal life. Here, for example, is just one very recent and unsettling article about a study published in the journal Toxicological Sciences. To be fair, most of the microplastics found in the study were polyethelene or PVC, which are more commonly used in plastic bags and objects than in textiles, but nylon, used heavily in textiles as well as in other things, was also high on the list.

What to do? I try to avoid buying new synthetic yarn whenever possible. It is not always possible, since many brands and types of wool combine natural fibres with nylon or polyamide. The vintage garments in my closet get worn and used and repaired, washing only as necessary, since the worst thing one can do with plastic is throw it away (doesn’t decompose, can release toxins into air or water if buried or incinerated). One good thing about 1960s and 70s synthetic fabric is that it is virtually indestructible. The dresses and blouses that I inherited from my grandmother or bought in secondhand shops look as new now as they did fifty or sixty years ago, and will presumably keep their bright colour and shape long after whatever environmental/nuclear/zombie or other apocalypse has destroyed humanity. (Maybe the giant radioactive cockroaches will enjoy wearing them.)

Anyway, enough soapboxing and doom. I’m sure you would all rather read about what readers in 1966 could make from this wonderful, evil new yarn! This issue uses it for a “fashion set of 3 garments”: the twisted-rib-and-eyelet pullover on the cover, a “casual dress” in a different type of twisted-stitch, and a sideways-knit pullover for men. All three feature bold and brilliant colours, a hallmark of early acrylic fabrics and in keeping with the bright, fun vibe of a mid-60s spring.

Twisted, textured and lacy pattern stitches show up in the other garments as well, like this update on the “granny” jumper featuring narrow just-above-the-elbow sleeves and a longline body with no extra ribbing or hem treatment, or the tunic-dress with lacy front panel and hem decoration for a little girl.

“Colour for Spring” shows up in a deep gold sweater suit with a chevron pattern made entirely of knit and purl stitches, a short-sleeved jumper in harlequin diamond pattern or a cute stranded hem decoration on a toddler’s “buster suit”. The ever-expanding use of colour photography really makes a difference here — in black and white, the designs don’t stand out, but artfully photographed with matching or contrasting background drops, they really pop.

For those not wishing to follow the pattern and colour trends, there’s a three-piece pullover, slipover and cardigan set for men in smooth beige crepe or brown bouclet, and a “country classic” high-buttoned, stocking-stitch cardigan in DK weight Fiona.

What about that “Needlework with Distinction”? Old-fashioned themes and designs make a comeback this month. There’s an impressive tapestry firescreen and rug with a pattern of early musical instruments guaranteed to “give an air of dignity to your sitting room on those occasions when you have more formal entertaining to do.” Impress your formal guests even more by hanging a homemade tapestry picture of Windsor Castle on your wall! Churchgoers can make a kneeler and prayer-book cover in tapestry, with a floral theme suitable for an Easter service. Spring flowers feature in the Victorian-inspired ribbon garland embroidery for a tablecloth as well, or the simple catkin sprays to be worked on a cushion, tray cloth or placemat.

Last but not least, we have a new children’s serial comic, in which Mark the mouse and Eustace the elephant set out in search of buns. Yum yum.

I love this issue, but strangely, none of the projects speak to me. I will use this month to finish a WIP that has been lying around for ever, namely the cardigan to this “softly fitting” jumper from the January 1962 issue, four years ago. I just need to finish the sleeves and sew some seams, so it should be finished soon.

February 1966: Flair for Tots

My February project (So glad 2024 is a leap year! It gave me one more day to get this blog post in on time) was this wonderful “Flair for Tots” set for a little girl. I made the coat-jacket and hat, but not the leggings.

The set certainly has plenty of flair, and “Flair” is also the name of the slightly heavier-than-DK wool-synthetic mix yarn that it is written for. I decided to use Soft Merino by Wolle Rödel, which is 100% wool, quite soft, and give me the correct tension of 19 stitches in 4 inches on 5 mm needles. The intended recipient (the daughter of a nice colleague, for whom I had already made both this “Practical coat” and this “Sunday Best Dress“) requested yellow and it looks like she was perfectly on trend — as soon as I bought the wool and started knitting, I started noticing how many people I saw in the course of a day were wearing a similar bright canary yellow.

The jacket pattern starts at the hem with a k7, p1 flattened rib. I made the back and fronts in one piece to avoid seams. The pattern switches to stocking-stitch a couple of inches before the armhole openings to make room for the belt (a simple strip of 6-stitch cable knit separately and sewn on later). The front bands are knitted along with the fronts and are exactly the width of one flattened rib, doubled over with a slip stitch fold line and double buttonholes.

In the pattern, the white wool trim at the collar (made separately and sewn on later) and cuffs is the same “Flair” wool used to make the rest of the set, but fluffed up by brushing with a teazle (aka teasel, teasle) brush. It’s a brush with metal tines for back-combing wool the same way you might tease your hair with a rat-tail comb, and with the same effect: it breaks and felts some of the fibres, creating a fluffy-blanket effect. Occasionally, there’s a pattern in an older Stitchcraft for brushed wool items (usually a baby blanket), and, there, readers are advised to send their finished knitting to a special service to get it brushed “for a very reasonable price.” By 1966, I guess anyone could buy a teazle brush and do their own brushing on the knitted trims.

All well and good, but these days one can also just buy fluffy yarn, and I saved myself some time and trouble by doing that. The white contrast yarn is Luxury Alpaca by Rico Design, a 63% alpaca, 37% polyamide mix that confusingly has both the terms “Superfine” and “Aran” in its name and knits up, like the Soft Merino, a bit bigger than DK on 4.5 or 5 mm needles.

The belt and collar are knitted separately and sewn on. The collar has a nice sort of crescent shape made with short rows. It is supposed to have double buttonholes to button up very high on the neck, but although I made the collar perfectly according to pattern and it fit fine on the jacket neck edge, the double buttonholes didn’t line up anywhere near each other. No worries — I don’t think any child would enjoy having something tightly buttoned around their neck, the collar stands up on its own anyway, and I didn’t even have to sew the buttonholes together, since the wool is so fluffy. Similarly, I saw no need to add a snap fastener to the neckline above the last button, as called for in the pattern, but I did add a snap fastener at the waist as indicated.

The hat is a simple modified beret, intended to be knit flat, but I made it in the round. The crown has a nice, easy decrease pattern: from 108 stitches, you k10, k2tog for 1 row (round), then 1 row straight, then k9, k2 tog, one row straight, then k8, k2tog and so on.

That’s it! I had a fun time knitting this set and was very glad to know someone to knit it for. I hope she likes it!

February 1966: Overview

“This is the time to look ahead and start knitting for the first Spring days,” writes “editress” Patience Horne in the header notes to the February 1966 issue of Stitchcraft. I get that feeling in February too. Of course, it is still the middle of winter and one may be drowning in snow or battling freezing rain or waiting out the long grey darkness, but every once in a while (like today), the sun will come out and I can imagine that Spring will arrive at some point. The fashions in this month’s issue are appropriately cheerful and fun, with a special emphasis on “Junior Fashion” for small or school-age children.

The cover ensemble brings back houndstooth, which never really goes out of fashion in the 60s, but was last seen in this form in the earlier years of the decade. It’s a clever choice for a skirt, as the fabric is fairly firm, preventing all too much sagging in the back. The set can be complemented by a wonderful pair of matching-pattern knee socks. Or you can achieve the lastest stitch-pattern trend, namely “the Crochet look with Knitting”, with a sweater that is… well, crocheted, for the most part. Only the sleeves are knitted, in plain stocking-stitch; back and front are crocheted in a bobble-treble pattern. The silhouette for both outfits is long and unshaped, but not baggy: the sweaters have set-in sleeves and high necklines and the skirt sits just above the knee.

Fans of the knitted look with knitting can make a fluffy lace shell (what a terrible camera angle for the model’s nose), or a classic V-neck cardigan with bobble panels in larger sizes. With the exception of the angora-mohair shell, all are made in DK or slightly heavier wool — it is still winter, after all. Knitters looking ahead to the spring can make a fabulous lace-panel dress with matching cardigan in “Paris Pink” crepe 4-ply. The cardigan has a similar design to the large-size cardigan, just with a narrower bobble band on the fronts and a high-buttoning neck.

For men, there’s a “sailer with the traditional look” in guernsey style. Instructions are given for “a girl’s a size and a man’s size” (34-36 or 39-41 inch chest) for the partner-look. (Of course, when they say “girl”, they mean a grown woman who doesn’t mind being linguistically infantilised.) The guernsey is nice! There’s a jacket in thick “Capstan” wool for men, as well, which also gives a sort of sailor-y vibe. The interesting stitch pattern is made with twisted stitches set diagonally. Twisted stitches also feature in the men’s “Country Gloves” pattern, where I imagine the stitch pattern makes the gloves particularly warm and hard-wearing.

In addition to all that, this issue has some wonderful “Junior Fashion” children’s patterns. There’s a nice thick blazer for an 8-10 year old girl and a knitted shirt with knitted tie to “make a small boy feel very fashion conscious.” If you say so, Patience Horne! There’s a rare sewing pattern, too, for a simple pinafore dress. Best of all is the coat, leggings and hat set for a 3- or 4-year old. The white collar, cuffs and hat are knitted in the same wool as the rest — Shetland-mix “Fiona” — and then brushed with a teasle brush. Teasle or teasel brushes are used to felt and fluff knitted fabric and were often employed in home knitting at the time to give knitted blankets that furry “blanket” texture. Some earlier patterns in Stitchcraft say you should take the finished item in to the haberdashery store or send it away by post to get it professionally brushed; this one assumes that you can do the brushing yourself.

With all these great fashions, it’s no surprise that the homewares in this issue are a bit standard: embroidery for a tablecloth, tea-tray or cosy, embroidered dressing-table mats, or a runner for a Scandinavian-style long coffee table (in very 1960s colours of Tangerine, Coffee and Green), for example. Spring style shows itself best in the stitched rug in traditional floral design, or the birds-and-blossoms wall panel in cross-stitch.

In the Readers’ Pages, we have reached the conclusion of our delightfully silly story of “Two Brave Bunnies” searching the world for a real live rabbit. (For those who haven’t been keeping up: the brave bunnies are sentient sewn toys.) Not having found a real live rabbit anywhere in town, they make the sensible decision to search the countryside instead. Et voilà! They find a real live rabbit and invite him home to come live with them and their human family. A happy ending for everyone involved.

There are so many fabulous patterns in this issue that it’s hard to not spend the next few months making all of them. I love the houndstooth set on the cover and the lace dress with cardigan, the child’s coat, the knee-high socks, the twisted-stitch gloves… Thinking both aesthetically and pragmatically, my choice was the child’s coat and hat set. I have too many clothes for myself right now and don’t want to start a huge new project, and while there are always great fashions for adults in Stitchcraft, there aren’t always nice projects for children. And I happen to know someone with a daughter of the right age and size, who would like it. And since it is not huge, there is a good chance that it might get finished on time. Perfect!

January 1966: Keep-them-warm Mittens

My 2024 New Year’s knitting resolutions are to 1) destash as much as possible and 2) finish all the “endless” WIPs. (Or to quote the famous German New Year’s Eve short film Dinner for One, “Same procedure as every year.”) In that spirit, my January blog project was made entirely from stash.

The mittens (Stitchcraft calls them “mitts”) are knitted in DK wool on two needles, i.e. worked flat and then sewn together. Aside from the fact that many mitten patterns were written this way at the time, it has a very practical reason in this case: the vertical stripes are embroidered on after the knitting is finished, which would obviously be significantly more difficult to do if the mittens were made in the round.

The original pattern uses the very 1966 colour scheme of “Loam Brown”, “Bright Olive” and “Tangerine” on a white background. I used leftover maroon wool from my 1920s men’s “sport coat” as the main colour, with stripes of white and medium blue (also left over from the same project) and light blue (left over from I don’t know what other project) with the intention of giving the gloves to the recipient of the 1920s cardigan as a late Christmas present.

The knitting was quite easy — all stocking-stitch. The horizontal stripes are knitted in the normal way and the thumb is made flat out of a gusset on the mitten. When the gusset is wide enough, you work the thumb to the end (back and forth), then pick up a few stitches at the base of the thumb and continue the hand part of the mitten flat as well.

The vertical stripes are embroidered in chain-stitch, which can be anchored very easily in the little horizontal strands between the knit stitches. That also makes it easier to keep the lines straight. The embroidery is on both the palm and the back of the hand. After embroidering, you weave in a whole lot of ends and sew up the side, top and thumb seams and voilà. I used a three-needle bind off on the tops or the mittens, since I thought it would be easier and more elegant than binding off and sewing a seam, but I don’t think it really made a difference in the end. I blocked them, but they hardly looked different before and after — all I did in the blocking was to widen the thumb a little bit, since it was fairly narrow in comparison to the hand width, and make sure the lines were nice and straight.

And that was it! Both I and the recipient are very happy with the finished mittens. They were quick and easy and used up some stash. Now I have some time in January to work on those endless WIPs. Stay tuned and maybe one will appear here soon.

January 1966: Overview

Happy New Year! It’s January 2024 in real time and January 1966 here at the blog. Get ready for shorter skirts (…finally. Stitchcraft is slow to catch up), horn-rimmed glasses, tweed bouclé and adventurous headwear. The theme of the January 1966 issue is “Colour for a Cold Spell”, with bright greens, redd and turquoise to carry everyone through the greyest month.

Our cover cardigan can be made long to wear as a coat as in the cover photo, or in fashionable hip-length. The trellis pattern is made by winding extra loops around the needle on the first row, then slipping this stitch on the next RS row to create a long loop stitch that is carried up via slip-stitches and knitted back in on row 7. The coat uses a whopping 28-33 ounces (ca. 750-900 g) of heavier-than-DK (modern worsted weight) “Flair”, so I would be wary about knitting this as it would presumably end up quite a bit longer than the 38-39 inches it should measure when finished. Love the pattern, though. I could imagine making the shorter cardigan in brown and embroidering it to look like flowers and plants climbing up a trellis.

Other women’s fashions include a turquoise pullover with both a vertical pattern panel and a horizontal stranded border. The matching hat foreshadows the weird and wild and fun and goofy hat fashions of the next couple of years to come. The trend for bold colour blocks is mirrored in the long-line boatneck pullover with its matching “helmet”-style cap. There’s a plain white pullover in slip-stitch rib and a very cute bedjacket — look at that come-hither smile!

Men’s fashions are oversized and conservative, in spite of the “New Look” advertised for this V-neck half-cardigan. The classic V-neck pullover with cable stripes can be knit in tweedy marled or smooth, plain DK wool. I like that the magazine includes photos of both versions, so that you can see how much of a difference the colour and style of wool can make.

“Junior Fashions” include a wonderful warm dressing-gown with knitted squirrels appliquéd onto the pockets and embroidered — so cute — as well as a winter going-out set of leggings, pullover and hat and an oversized cardigan-jacket. The jacket claims to be windproof, which seems an odd claim to make about something knitted in an all-over eyelet pattern. In any case, all the children’s fashions are colourful and fun, and we will start to see the influence on adult women’s fashion as the 60s get swingier. Older children — or adults with small hands — can get a pair of warm mittens knitted flat and sewn together at the side. The plaid-like pattern is made by embroidering the vertical stripes in chain-stitch onto the finished mittens.

There are lots of homeware projects in this issue, January being a good month to stay inside and do needlework. The stitched rug is warm and sturdy, made in a Florentine stitch pattern that never really went out of fashion. You can knit a doll’s outfit complete with underwear and shoes, crochet a “tangerine” tea cosy with green felt for leaves, or make a cross-stitch border for a cushion or waste-paper basket.

For advanced needleworkers, there are wall pictures of “needle etchings” (black-and-white pictures embroidered in stem-stitch to give the effect of a pen-and-ink drawing) of Sussex churches or colourful flower sprays, as well as a tablecloth in rare “shadow work”, where the thread carried on the back side deliberately shows through the filmy organdie backing fabric. (Personally, I dread the thought of the back side of my embroidery being visible, ever…). For expert crocheters, there’s a lovely lace doily with a linen centre.

On to our children’s comic! The two brave bunnies (both plush toys) are still in search of a real live rabbit. Not having found one at the carousel, cinema or department store, they try the seaside, because why not? They have fun at the beach and think they find a rabbit — alas, it is only an inflatable sea-water toy! Will they ever complete their quest?

I will leave you with the latest wonderful ad from the Scotch Wool Shop, which had just launched its own line of very pretty underwear, “Golden Charm”. Available in 49 lucky towns! I hope your town and your 2024 are equally lucky. My project for this month will be the embroidered mittens.

December 1965: Workbag & Pretty Idea

It was hard to choose a project from the December 1965 issue. There were lots of nice things in it — the red pullover on the cover, the men’s classic cable V-neck, the two-piece wool dress, the fun knee-high socks, the swingy ribbed skirt — but I was not feeling any of it. I have so many large, unfinished projects and so much wool in stash (of which none would be suitable and/or enough for any of the nice garments in the issue.) Also, I have way too many finished knitted projects! My closet is past full. I need to start knitting exclusively for other people.

Though, as it turned out, I had also already made one of the projects from this issue, back before I started the blog. At the time, I had lots and lots of leftover Rauma 3-ply (which is double-knitting weight, not what you normally would expect “3-ply” to be) and Jamieson’s Double Knitting in stash from a tam and mitts combo that I had designed for Knit Now. And here in the December 1965 issue of Stitchcraft was this wonderful “Workbag for a friend” that was perfect for using up leftovers. The check pattern is easier than it looks — the colours are just staggered every four rows. I adapted the stitch counts to make it work with DK wool instead of the 4-ply called for in the pattern.

The bag is made in two pieces for front and back, with two separate gussets made in 1×1 ribbing, for the sides. This makes a nice, big bag. I bought non-vintage handles which were unfortunately not real wood, but accurate reproductions of the type in the magazine photo. They have a slot at the bottom through which you insert the ribbed top of the bag, fold it over to the inside and sew in place. Very easy. Although it’s not called for in the pattern, I lined the bag with non-stretchy, woven cotton material to keep it from stretching. It’s a great bag and I use it for large projects. (I apologise for having only a finished photo and no in-progress pictures. At the time, i didn’t know I was going to start writing a blog, and only took pictured of finished objects, if at all.)

Still, I felt like I was “cheating” by not making at least something new from this issue. How about a “Pretty idea for a Buffet Party” i.e. a trolly cloth and napkins embroidered with Christmas trees? Too much work… but how about one little embroidered Christmas tree on green felt, made from stash and sewn into a little bag to use for a tiny present? Okay! I had plenty of green felt scraps from various other projects and plenty of white, brown and gold embroidery cotton.

The tree is cleverly “drawn” in one single swooping line and worked in easy chain stitch. The pot is brown long-and-short stitch and the stars, straight stitch with French knots. Since nothing writes or transfers onto dark green felt, I traced the pattern directly from the magazine page onto sewing-pattern paper, embroidered over the paper and dissolved the paper under running water.

Too lazy to set up the sewing machine, I sewed it into a little bag (approx. 4 x 4.5 inches or 10.5 x 12 cm) by hand (very badly, very crookedly. Sorry, it is the end of the year, and I am tired) and fastened it with a snap. The yellow cotton I used for lining seemed familiar… Oh right, it was left over from lining the workbag, six years ago! I guess that brought everything full circle.

On that full-circle note, I hope you all have a very happy New Year. See you in 1966!

December 1965: Overview

Here it is — the 1965 “Christmas Number”! December at Stitchcraft is always a month of “quick” holiday trimmings and small gifts, mixed with warm winter clothing and party ideas.

Our cover model is wearing a cable-block pullover (with non-crossing cables) in bright red double-knitting weight wool and matching knee-high socks in a lacy rib pattern. The caption on the pattern page is “Fashion feels Young” — Stitchcraft is finally getting into the children’s-fashions-for-adult-women idea that influenced so much of mid-60s fashion. Note the short skirt on the cover model, along with the knee-high socks, the playful kerchief and the big straw hat accessory in the black and white photo. It’s not quite Twiggy or Mary Quant (spoiler: Stitchcraft was never that fashion-forward), but it’s starting to show their influence. “Young Fashion” fun is reflected in the matching cap and pullover set as well. Look at the enormous pom-pom on the hat, outdone only by the model’s fake eyelashes!

The other women’s fashions in this issue remain conservative: a warm tweed dress made in two parts sewn together at the waist (thus the obligatory belt), a cabled cardigan for larger sizes in thick, undyed “Capstan” wool, a lightweight wool jumper and swingy knee-length skirt in a “gay note” of blue or a “harlequin” pattern jumper in “bold” 1960s colours of white, gold and brown. I feel exactly the same way as the model in the colour photo when I finish a project and find that perfect gift on the same day.

Men can get a cabled pullover in a glorious shade of purple tweed and the reassurance that cables are manly (like our model’s eyelashes, which are almost as impressive as his colleague’s with the pom-pom hat). There’s a boatneck pullover in herringbone stitch as well, meant to be worn over a simple polo- ( aka turtle-)neck jumper, for which a pattern was given in the previous issue.

The manly-cable idea is continued on a lovely warm pullover for boys, and his younger sister can get a button-up cardigan in a frothy textured stitch pattern, made in synthetic-wool “Brilliante” for easy washing. Younger tots can enjoy warm ears with a chin-strap “helmet” hat that is guaranteed not to fall off or get lost.

The real focus of the issue is of course, Christmas preparations. Felt appliqué makes a big appearance this year, with place mats and name cards for the holiday table as well a winter-scene wall hanging. The appliqués are quite simple and designed to be used with scraps, and the instructions give ideas on alternate uses such as glueing the felt pieces onto paper for home-made Christmas cards. The place markers have a butterfly motif, making them appropriate for any time of year. Cutwork and embroidery fans can make a tablecloth with peonies, or a Christmas-tree-themed trolley cloth and napkins embroidered in simple chain-stitch. More religiously-minded readers can make a tapestry wall hanging of a Nativity scene (colour photo on inside back cover).

After dinner, it’s on to the gifts! The knitted tea cosy is supposed to represent a holly plant. The “workbag for a friend” is a fun way to use up leftover wool and I made one a couple of years ago. The “cushion for Granny” is a similar stash-buster. One would think it would be made in two squares either fron the center outwards or the edge inwards with raglan-type shaping, but no, you are supposed to make 4 identical triangle pieces for each side of the cushion and sew them together.

And let us not forget the other cushions: a simple cross-stitch number with a woodland design and a tough woven-tapestry chairback cushion in soumak and herringbone stitch. The colour scheme is brown with brown, with touches of orange and lime green for contrast. In the “just for fun” category, you can knit cosies for golf clubs.

Our two brave bunnies from the Readers Pages are still on their quest to find a real live rabbit. Thinking they might find one in a department store (why not), they get stuck on a moving staircase, try to eat a plastic apple, and find a stuffed rabbit who, unlike our co-protagonist Sale Price (also a stuffed rabbit), sadly cannot talk. Next month, they will try the seaside, which is not known for being home to very many rabbits, but I suppose a better chance than a department store, a movie theatre or a merry-go-round. Of course, around Christmas time, one of the surest places to find a real rabbit would be on the dinner table, ha ha. I guess that storyline might be considered inappropriate for a light-hearted children’s comic. At least our two toy rabbit protagonists aren’t in danger of being eaten.

Finally, there’s another wonderful advertisement from my favourite Stitchcraft-ad store, the Scotch Wool Shop. Here is a nice little article about a knitting book produced by the Fleming, Reid company, proprietors of the chain of shops. The ads always make me want to go out and buy things from the stores… which, sadly, no longer exist. These little gift ideas are marvellous.

That’s all for this issue — and this year! I don’t know what I will make from this issue, or if I will just write a post about the knitted workbag that I already made a while ago. I quite like the ribbed skirt, and could use one, but one look at the gigantic WIP pile discourages me from starting any long and boring project. Hopefully I’ll get a couple of those WIPs finished and can write about that for a 1965 / 2023 wrap-up. Until then, I leave you with this graphic from the December 1965 issue. Happy Holidays!

Blast from the Past: Hooded Pram-Coat

Photo of baby in knitted jacket, Stitchcraft, October 1965.

EDIT December 19th, 2023: Finished!

It’s been another month of much knitting and comparatively little to show for it. There was a wonderful bed-jacket in a cute, spongy slip-stitch pattern in the November 1965 issue that I very much wanted to make. I thought I had the perfect yarn (DROPS Lima) and chose green and black for the colours — very much my taste — and started on a swatch to better understand the stitch pattern. I made it correctly, but it didn’t look good. I tried with different wool and different colours. Still didn’t like it. The way the two colours played with each other didn’t harmonise and didn’t give the effect I wanted. I couldn’t make it work with the wools I had and didn’t want to make it in baby blue and white (I don’t wear white). On top of it all, I had a pile of endless WIPs at home and two pregnant colleagues, one whose baby was probably being born just in time for this blog post at the end of November, and another due in January. So I decided to put the bed jacket plans on ice and make some baby things instead.

For the November colleague, I made a simple baby blanket in thick cotton yarn of the “dishcloth” variety. The pattern wasn’t vintage — just the traditional crochet “American square” motif with white edge and different colour centres — but the yarn actually was! A couple of years ago, another colleague (not the pregnant one) had to clear out her mother-in-law’s flat after the elderly lady moved to a nursing home, and gave me a huge bag of yarns that had been left behind. In that sense, the blanket does have a vintage connection, though this type of craft cotton honestly hasn’t changed much in fifty years. Here’s the finished product:

For the January baby, I looked through a few earlier Stitchcrafts from the 1950s, which often had the best baby patterns, and found an intriguing hooded “pram-coat” jacket from the October 1956 issue. I say “intriguing” because it had some unusual design aspects, like the front hem facings that fold under to make a hidden button band, the wide-edge hood and the turned-back-and-crocheted-on sleeve cuffs. I still had some light blue and white-ish Lana Grossa Meilenweit from the March 1964 Slipover for a Smart Tot — probably not enough for the whole jacket with hood, but I thought I might make the sleeves in dark blue (left over from the same project).

The stitch pattern is a nice basket-weave over 3+3 stitches, with 2 rows of stocking-stitch interspersed to even it out a bit. There isn’t supposed to be a hem at the bottom, but it curled so badly, even in the basket-weave pattern, that I picked up stitches from the cast-on and made one with a purl row for turning. Similarly, the sleeve cuffs were supposed to be knit separately, sewn on later, turned back and then crocheted over, but why so much effort? I made a hem the same way. Continuing in the spirit of saving time and energy, I made the fronts and back in one piece up to the armholes, the sleeves flat and two at a time on one needle, and the raglan yoke in one piece back and forth. There wasn’t enough light blue to even make the whole fronts and back, so I bought more to the whole thing in light blue, as in the pattern.

Of course it occurred to me, when halfway finished, that I could have made the bed-jacket pattern after all, just adjusted the size and yarn to fit a baby... and then it would have had the same colour scheme as the original, too. Too late! What can I say. My brain had been occupied with too many “real-life” things.

Part of those real-life things included a lot of work-related travel on trains, which has the advantage of giving me lots of time to knit — and the disadvantage of not being able to take good in-progress photos. Here are some of the jacket after completing the body and knitting the front bands, with a lovely background of train floor. The front bands are picked up and knitted horizontally in the usual way and folded under, so double thickness, and the buttonholes are only on the inside part of the fold, so that they are hidden when the jacket is buttoned. There are increases at the neck edge to make a sort of top facing in the front “corners” where the hood join ends.

The hood is made in a separate piece from the brim to the neck, with short rows to round out the top part. Here again, the instructions said to make the hood in blue first and pick up for the facing later. I could have just cast on with white and made the facing first to avoid having to pick up along the cast-on edge later, but I was happy not to, since I had limited white wool — I ran out and had to switch to blue for the under-facing part (after the fold). That wasn’t a problem and the white wool remnant has now been successfully de-stashed.

I added lightweight wooden buttons. The covered-button design didn’t really convince me, in the end, since I imagine it will be unnecessarily difficult to button up if the baby is squirming around, and the doubled facings are a little bulky even in 4-ply, fingering-weight wool. That said, the facings will put up with a good amount of wear and tear. The finished jacket is really cute and should fit a larger baby in the first few months as an “outdoor” pram jacket, or maybe a six-month old as a cover-up on cooler summer days.

I hope the my colleagues will be happy with this baby jacket! The mother is herself an expert knitter and seamstress, so the bar was set high. But I’m quite satisfied and I think they (and the baby, of course) will be too.

November 1965: Overview

Colour Radiance for Winter and Christmas Plans! At Stitchcraft, it’s generally either preparing-for-Christmas time or spring-summer holidays. This month, they countered the cold, grey days of November with bright, cheerful colours and easy homewares. Let the festive preparation begin.

The knitted sweater suit on the cover is made in an intriguing pattern stitch designed to give “the look of woven texture.” There’s a helpful close-up photo of the stitch pattern as well. Essentially, it’s made by making a wool-forward (yarn over) on the right-side row and then slipping that stitch over a garter-stitch base to make a horizontal “line”. The placement of the slipped stitch is staggered, to make a diagonal herringbone-type effect. Made in DK wool, I’m guessing the finished result is quite warm. The matching skirt is made in plain stocking-stitch. Note that the mini-skirt, or even anything-above-knee-length skirt, still hasn’t caught on with Stitchcraft’s more conservative readership.

Other women’s fashions include a bobbly-cabley “overpull” in undyed “Capstan” wool, made to be worn over a roll-neck knitted underblouse with or without sleeves. The underblouse keeps up the warm colour trend with the suggested colour of “Old Gold”. I love the model’s hairstyle!

There’s also a jumper for larger sizes with very ill-thought-out decorations going right over the bust, and a collared almost-cardigan with a deep placket and Peter Pan collar. The collared number is made in tweedy “Glenora”, one of the multicolour wools gaining popularity at the time. Men get a corollary set to the women’s “overpull” and “underblouse” with a slightly oversized bobbly-cabley cardigan and a 4-ply polo-neck in the same “Nylox” wool as the ladies’ underblouse. The “colour radiance” theme apparently does not extend to the men’s garments, being made in undyed Capstan and “Oystershell” off-white, respectively. The photo backgrounds colours are nicely chosen, though, to set off the diagonal poses and camera angles.

The photo of the girl’s twin set in the inside front cover photo also does a great job of harmonising the backdrop to the subject. Her set consists of a pullover with unbuttoned waistcoat in cheerful pink and blue. Her little brother or sister can go out in the pram or “toddling” in a warm set of hooded jacket and leggings. The child in the photo looks somewhat apprehensive, but the set looks quite snuggly.

And can we have a moment of appreciation for this “special gift” of a bedjacket? I love it! I would make it without the ribbon at the neck and wear it as a normal cardigan. The two-colour pattern is made by working and then dropping yo’s to make a “long” stitch, which is then carried up through the slip-stitch background. I am guessing it is quite spongy and squishy, and was also nice and warm in those unheated 1960s bedrooms. Love the hairstyle in the colour photo, too!

If the model on the left is looking a little suspicious, it’s probably because she was photo-bombed by Homer the Rabbit, star of our current children’s serial comic, “Two Brave Bunnies.” For the uninitiated: Homer (a home-made stuffed rabbit) and Sale Price (a store-bought stuffed rabbit) are on a quest to find a real live rabbit friend. So far, they have only met a merry-go-round rabbit, who assured them that he was not real, as he could carry children on his back. In this month’s episode, our two brave bunnies head to the Town, where they are eager to see “Miss Rosabelle Rabbit” on the cinema screen. Alas, she is only a film rabbit, so cannot communicate with our friends. No matter — they will persevere! Oh, right — and this month’s issue includes instructions on how to make your very own home-made Homer doll from felts.

Home-made Homer is one of this issue’s many small, fun “colour novelty” gift and decoration ideas, along with a felt Nativity panel mimicking stained glass, a couple of pot holders and a colourful ball to use as decoration or a baby’s toy. Embroidered gift ideas include a whimsical sewing apron and a cross-stitch calendar and chairset. I don’t really understand the calendar — it seems to be just a vertical wall panel that you attach the (tear-off?) small calendar onto. OK, I guess, but maybe not necessary?

You can also knit a stuffed panda bear, a snowman, or a garter-stitch blanket rug, or crochet a round disc to be adapted into either a girl’s beret or a round cushion. There’s a filet crochet table centerpiece and tapestry wall pictures of caravans or Bibury. Last but not least, there’s a counted-embroidery cushion-and-chairback set with a vivid purple flower design.

I don’t know about you, but I feel cosier already. My design for this month will be the bedjacket! The October 1965 cardigan blouse is almost finished, too, and I’ll update that post soon.

October 1965: Picot Trims

EDIT November 12, 2023: Finished!

This month’s project was the simple, yet elegant “Cardigan with Picot Trims” from the October 1965 issue. It is made in stocking-stitch with 3/4 length raglan sleeves and hems at the lower edge, front bands, cuffs and neck. The fronts are then trimmed with simple crochet picot edging and the back is left plain.

It was the perfect project for the Rohrspatz & Wollmeise “Lacegarn” wool (100% merino wool, superwash, hand-dyed) that I had bought at the Sulinger Wollfest this past summer. The pattern calls for Patons Beehive 4-ply, so a little thicker than my laceweight, but that meant that for once, I could use the intended needle size and get the intended tension (7 sts and 9 rows/inch on No. 10 (3.2g mm) needles — I used 3 mm and it worked perfectly.) The yarn is glorious, with its deep, glowing green colour, which is deepened by the slight marling that results from the hand-dying process. This hank (300 g) was even discounted due to possible knots, breakages or dying errors, but there were none of any of those that I could find.

I had resolved to never again make a garment with a stocking-stitch hem in lightweight wool, since in my experience it stretches out horizontally and the whole garment shrinks vertically, turning even a slim long-line into a boxy tent. In an attempt to counteract it, and to avoid the ballooning back and general dumpiness of 1960s unshaped style, I added some waist shaping, decreasing every 6 rows to just below my natural waist, knitting 2 inches plain and then increasing up to the required number of stitches. I decided to make the decreases not at the sides, where one would expect, but 12 stitches in from each front edge (where the picot trim is sewn on later) as well as 12 stitches in from each back side edge and 12 stitches in from the middle back symmetrically. Yes, this meant I decreased twice as many stitches on the back as on the fronts. And it worked! The back fits well without being too tight or ballooning out over the waist and the front has an elegant curve. Plus, the picot trims will cover up the decrease/increase line on the fronts.

In that vein, I increased up to the correct amount of stitches for the second size on the fronts, but kept the back at a stitch count between the first and second sizes, to allow the front to be wider than the back even before allowing for the extra inch or so of the front bands. The sleeves (which I actually knit first) were a bit tight, so I went ahead and increased up to the third size. I also made them longer. The 14 inches specified in the pattern for 3/4 length is closer to elbow length on me, and didn’t look quite right. I increased to 16 inches, which gives a nice “bracelet” length.

I made the raglan decreases as intended — sleeves decreasing every 4th row at first, then every other row, and always every other row for the fronts and back. Of course, the counts didn’t match exactly, since the stitch counts were from different sizes. Also, I wanted the neckline to sit a little lower and I was concerned that the yoke might be too long — I didn’t check row tension, but it seems to be not 9 rows/inch. I ended up making the initial neckline decrease about an inch below where it would have been in the pattern, ending where it fit the best and just making some extra decreases on the last row to pull the back neck in a bit for the neckband.

The front bands are made separately and sewn on. I guess I could have knitted them with the fronts and back, which I made in one piece anyway, but I didn’t think of it in time. And anyway, making them separately meant I could make them on smaller needles. For once, I got the spacing of the buttonholes right! Stitchcraft always tells you to make the button band first, sew it on as you go, then mark the places for the buttons with büpins and make the buttonholes on the other band to correspond. It does not always work as well as you think it should.

After the button bands and the neck band were finished, and the underarm seams grafted (terribly. So terribly. I can not seem to master the Kitchener stitch no matter how it is taught), it was time for the picot trims. I thought it might be possible, and easier, to crochet them directly onto the fabric instead of making them separately and sewing them on, as the pattern indicates. I tried it on a swatch, crocheting into the horizontal bar between stitches and working into 2 of every 3 rows. That gave a good length, but also made the trim stand up straight instead of lying flat to the side as it should have. So I crocheted the trims separately and sewed them on, handily covering up the line of decreases and increases from the waist shaping in the process.

That left the buttons! Which were, strangely, the most difficult part. I wanted round, flat buttons with a back hook (not holes), as in the photo. So very 60s and in my opinion, they really make the outfit. But neither the colour of the wool (a deep, slightly blue pine green, none of the photos here really do it justice) nor the style of button seem to be in fashion. I looked at different stores, online button shops, vintage buttons on ebay… Nothing close. Luckily, my local wool/sewing shop can cover buttons with fabric if you have the right fabric. What do you know, this colour is not in fashion for fabric either! I finally found some gorgeous green stretch velvet and used the wrong side (not the velvet side) for the fabric buttons. Perfect.

In fact, everything about this project was perfect. The fit is perfect and the waist shaping worked perfectly. The sleeves blocked out to exactly long-sleeve length. The wool is wonderful, the colour is wonderful, and the finished blouse looks exactly like the photo except for the colour choice. I even managed to twist my back into almost as hard an S-curve as the model in the photo… (Rotating the finished photo helped too.)

May all your projects work out so well!

October 1965: Overview

Colour and Tweed for Autumn! This is a “bumper” issue full of many beautiful designs for adults, children, homewares and “novelties”, all with an autumn theme. My apologies for the slightly late post — I was traveling last week with no computer.

The cover photo is a “Chanel Style Suit” in Bracken Double Knitting tweed wool. 1965 was the heyday of Coco Chanel’s pioneer boxy, tweedy suit that was all the rage with celebrities and modern women. Her designs combined Scottish tweeds and multi-colour fabric patterns by Bernat Klein with her signature comfort, ease of movement and simple elegance to make a modern, essential wardrobe staple. Here is an excellent short introductory film about it (I’m sure readers of this blog will need no introduction; still, it’s great.) The knitted suit design in this issue of Stitchcraft is very true to the Chanel model, with its thick, tweedy wool, above-knee skirt and functional, square pockets in the jacket. There’s a short-sleeved knitted blouse in turquoise to match.

Other women’s garment designs include a brilliant red dress in Paton’s newest wool, Fiona; a “continental” pullover in a broken-cable design in regular Patons DK wool, a plain pullover with “new styling”, also in Fiona; and a fine-knit cardigan with crochet picot trim.

“Fiona” wool was a mix of Shetland wool and synthetic “Orlon”, made to combine the best qualities of both — warm, and lightweight like the wool, but easy-care and less scratchy. The “new styling” of the plain pullover means it is longer (23-24 inches) and looser-fitting than previous classic designs, and the raglan armholes are deeper, for an all-around casual fit. Colours are bright and snappy with yellows (“Maize”, “Celtic Gold” and “Inca Gold”) complementing the bright red of the dress. There’s a slipover for men as well, in bright “Peacock” shade and made in slightly thicker “Flair” — also a wool-synthetic mix. Cables of all sorts are popular, and the longer length can be seen in the Fiona advertisement as well as the garment photos.

The accessories are limited to one hat — but what a hat! The “tucked” pattern is made by inserting a “life-line” type extra thread every 5 rows and then knitting those stitches together with the current row. I love it, though the model has an unfortunately ridiculous expression on her face in the photo. No designs for babies this issue, but two wonderful and colourful sweaters for children with stranded hem and yoke accents.

In the embroidery and homewares department, we have the usual designs for cushions, chair-backs and chair-seats, plus a granny-square crochet pattern to use up scrap wool that, backed with woven fabric, can be used to make a workbag or cushion. Like the garment designs, colours are bright and bold, with reds and blues prevailing, along with black and white.

More advanced needleworkers can make a very pretty firescreen or a blackwork wall panel. Finally, there are embroidered cushions with flower designs — cornflower, corn not-flower-but-actual-corn, and red poppies. The loose, almost flowing style of the cushion designs looks ahead to later and even simpler patterns — complicated Jacobean work was on its way out. There’s a practical stitched rug in a geometric design as well.

The bizarre-bazaar “novelties” never fail to amuse and wonder, and this month’s issue gives us a knitted tea cosy (festooned with pom-poms) that looks like a giant orange and/or lemon, and a crazy-eyed “Pete Puppy” doll in sewn and embroidered felt fabric that can be used for storing sewing implements — just poke those spare pins right into his belly like a voodoo doll. The “Readers Pages” offer some reprints of popular designs from earlier issues: a doll’s clothing set from November 1940 and a crocheted pram cover from … when was it exactly? It doesn’t say in the instructions and couldn’t find it in my previous posts, but I know I have seen it in another issue — possibly pre-1960.

In the current comic (really, one of the best ones), homemade rabbit doll Homer (because he’s home-made, get it?) and his friend, the store-bought rabbit doll Sale Price (self-explanatory) go on a quest in search of a real, live rabbit. Here’s they find a rabbit on a merry-go-round, who explains to them (logically enough) that he cannot be a real rabbit, as he can take children for rides, which a real rabbit cannot. Pedagogical message for children: do not try to ride on a real rabbit! Alas, Homer and Sale price must look further, and will continue their adventures in next month’s issue.

I will leave you with this ad for the Scotch Wool Shop, purveyors of knitting wool, stockings, underwear, and fashionable clothing for women. Always keeping up with the times, the ad shows a crocheted dress in Mary Quant style, named “Troy” and perfectly photographed for the Swinging Sixties.

That’s all for now! I have so, so many unfinished projects, but cannot resist the temptation to make the fine-knit cardigan blouse with picot crochet trim. It will definitely not be finished on time, but as always, I will update project posts when progress has been made.

September 1965: Comfortable Cushion

EDIT 2 October 7, 2023: Finished!

This month‘s project was another modern adaptation of a 1960s homeware object. In this case, the original design was for a knitted „comfortable cushion” in a use-up-your-scraps striped slip-stitch pattern. I had plenty of scraps to use up and a request to make a little wrist cushion for someone who works a lot on the computer and had been padding their wrists with a folded scarf. The yarns I used were some more of the lovely Slow Wool Lino from Lana Grossa with bits of leftover sock wool for the contrast colours.

The original cushion measures 15×12 inches using a cast-on of 83 stitches of DK wool. I wanted a 14×4 inch cushion in fingering weight and calculated that out at 79 stitches in width. The stripes are made in slip 1, knit 3 pattern in alternating colours.

Everything worked out out fine on the first cushion piece. The width was perfect and three rows of stripes with 6 plain rows at beginning and end were a good height. The pattern was so very, very 1960s! Especially in the brown and brown and grayish brown and blue colour scheme (by request from the intended recipient.)

It was, in fact, a bit too authentically 1960s for the recipient, who requested a different pattern to use on the other side of the cushion. How about Space Invaders monsters? (i.e. hipster 80s retro instead of grandpa‘s 60s retro.) Space Invaders it was! I adjusted the number of blank rows on the Space Invaders piece, since the slip-stitch pattern pulls the knitting together even more than stranded work.

Then I made two more smaller squares in the same design, to make a pad for when the recipient might want to hold their wrists farther apart. All of the pieces curl a lot, as you would expect from stranded and/or slip-stitch patterns worked flat, but when I uncurled them, they seemed to be just the right size.

I wash-blocked the pieces, which flattened out both patterns admirably, and realised that I had made the Space Invaders piece too narrow. Not wanting to knit it again, I made two little strips to sew onto the sides — not elegant, but it fit.

I sewed up three sides and tacked 2 layers of quilt wadding to each of the insides, then turned around and sewed up the fourth side.

It’s… OK, I guess? The slip-stitch side definitely looks like a brown-on-brown 1960s home-made pillow, so you could call it authentic. But it’s not really one of my more interesting or beautiful projects. It should be useful, at least.